
This is an old revision of the document!
Table of Contents
How do I create a Network Campaign?
In order to create a Network Master Campaign the network campaign manager has to be activated. It is not available by default. Therefore talk to your account manager if you are interested in using network master campaigns.
What is the Network Campaign Manager?
The Network Campaign Manager allows marketers to manage multiple partner clients at one place and to distribute target groups and messages in an automated process.
The Network Campaign Manager offers these options:
- To administer e-mail campaigns centrally in on master client
- To automatically distribute and deliver a master message to any number of network partners, taking into account the local configurations of all partners
- Central management of target goups with automated doublet check and dividing those target groups to the individual partner clients
- Integrated approval process
- Central planning of delivery and statistics
Setting up a Netzwerk Master Campaign
A network campaign allows you to create and manage a campaign centrally within a master client. Both target groups and the creative are distributed to the partner clients automatically.
Create a network campaign by following these steps:
- Create a new campaign
- Add network clients
- Set the deadline
- Define content
- Check the previous steps and settings
- Deploy the campaign
- Receive approval by the network partners
- Assign target group
- Dispatch
Step 1: Create a new campaign
Create a new campaign at Delivery > Drafts > Create campaign.

Define the campaign’s details:
- Insert a description for the campaign
- Select the commissioning client
- Choose Network Master Campaign as the type
Step 2: Add network partners
Add the wanted network clients to a campaign by clicking the button Add Network Partner.

In die pop-up window the network partner has to be defined:
- Client: Select the network partner who is supposed to receive the campaign
- Number of recipients: add the number of recipients for this client
- Versanddatum: Hier können sie das Versanddatum festlegen.
Via the button Network Information you can view the status quo of the network.
Step 3: Set the deadline
Define the deadline in the campaign settings on the left:

The deadline is the time to be defined, at which all approvals have to be done by all network partners. If it was configured this way in the client setup, the deadline will automatically be sent to the partners via e-mail.
The specification of a deadline is mandatory. Campaigns can only be provided and distributed after it expires.
Step 4: Definition of Content
The content of your mailing has to be entered in the detail view of the campaign’s creative. Scroll down to find it in den campaign details.
- In the Settings box of the e-mail you can enter the subject line

- Further down you will find the Editor which allows you to edit the message

- Header and Footer are automatically added in every network partner. They do not have to be defined here.
- Note: In the master client’s preview there will be neutral placeholders for headers and footers
The code has to meet the following requirements:
- valid HTML Code
- especially opening and closing <html>, <head>, <body> tags
- alignment of the e-mail defined by align= “center“ / “left“ in the first (outer) table
- Header / Footer are 100% variable in width
- Recommendation: note the promio.connect e-mail-facts (or brief the suppliers of the creative) to ensure the correct display of your message in the e-mail clients
Step 5: Reviewing the previous steps
Please review and check all settings, e.g.:
- Is the advertising email designed correctly? (check via Quality Control, Inbox Preview etc.)
- Are all network partners added to the list?
- Did you select a deadline?

Step 6: Providing the campaign
To distribute the set up campaign to all network partners the campaign has to be provided to them. This action automatically creates a new campaign in the chosen partners, or the already existing campaign will be updated after changes.

Please mind these aspects:
- When providing, the template of the network partner will be taken into account. This means that the header and footer will be added to the advertising mailing.
- When providing also the deadline will be communication to all partners via e-mail.
- You may optionally start a test mailing:
- The master client receives all versions of the network partner
- Or the each partner receives its individual version of its own list, including the corresponding header and footer
- The partners’ approval can be withdrawn if bigger changes were made and the campaign gets provided again
- Providing and test mailing are jobs which are processed in the background. It can take a minute until the campaigns are created and the test mailings are sent out
- The providing of the campaign is registered in its history
Step 7: Approval through partners
Each network partner can be configured differently regarding the approval:
- Optin-process:
- The campaign is controlled by the deadline
- The network partner can approve a campaign up to this point in time
- When there is no approval until the deadline is over, this network partner has to be removed from the list manually.
- Optout-process:
- The campaign has a „buffer time“
- The network partner has the opportunity to remove its approval during this timespan
- When providing the campaign the approval is given automatically and can only be removed by the partner
The status of approval is visible in the listing of all network partners:

Also read below the section “Review and approval through network partners”.
Step 8: Assign a target group
Assign a target group to the campaign – the list will be distributed to the network partners depending on the options chosen.

- Select a matching method:
- Prefer small target groups. This option will list all target groups, starting with the smallest and going up in number
- Optimize CPT. This option prefers the lowest cost.
- External Definition (recipient limits per partner are disregarded). . Priority is chosen due to external properties. This is an individual configuration of you network.
- Set a limit (optional)
- Temporary Blacklist: Here you can exclude blacklists, which were uploaded before, from this specific delivery.
- Choosing a target group:
After clicking OK a job starts which segments the target group. When the job is finished an overview displays the target group segmenation:

The shown numbers correspond to the delivery that is prepared today. Before starting the dispatch the selection might have to be updated.
In the list of all target groups you will find the following standard target groups. They give you an overview of how many addresses are available in each partner client.
- RAW_ID_Name: Gross volume of the partner (ID and name identify the partner)
- CLEAN_ID_Name: Net volume of the partner after doublet check. (smaller partners are prioritized)
- NETWORK: Net volume of the entire network
Step 9: Delivery
When all approvals are given and all target groups are assigned, the delivery can be started through the master client.
To do so insert a delivery date for the action Send campaign. Individual network partners can have individual delivery dates and time, too.

When clicking OK you will be lead to the quality control. Review the e-mail and confirm the quality check:
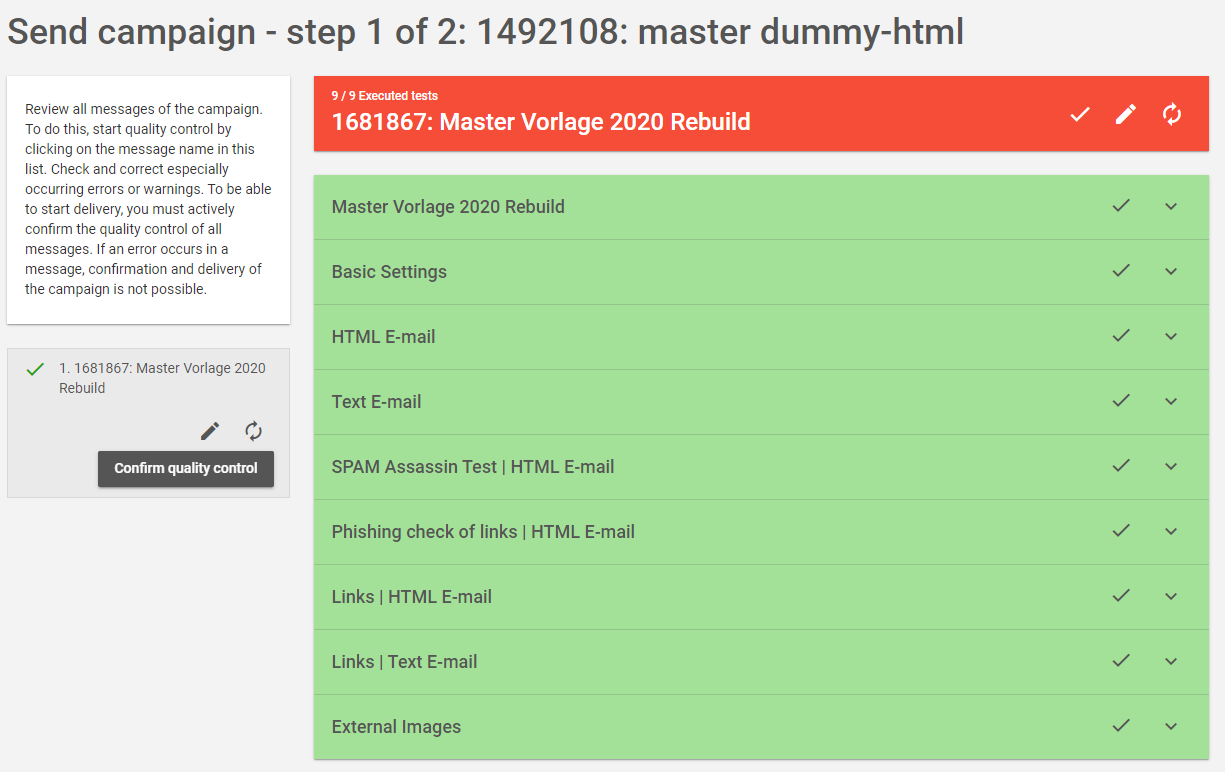
Go to the next step.
On the last page you will see a complete overview. It shows all selected partners, as well as delivery volume and date. Also a preview of the different mailing versions are displayed:
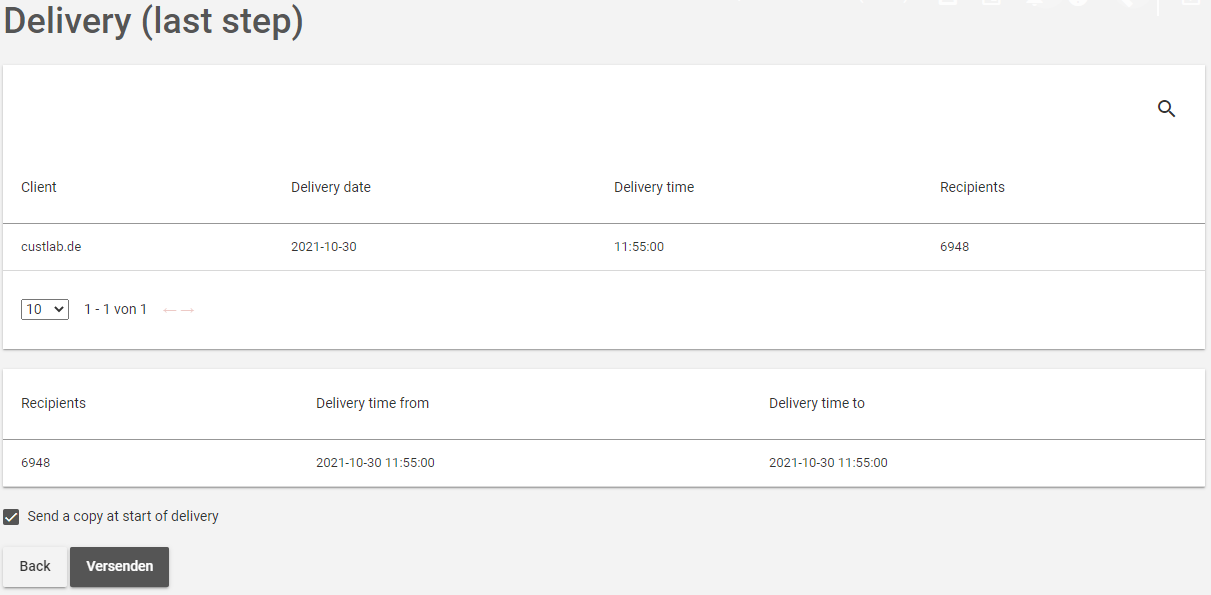
After clicking Start delivery your email will be prepared in the background and sent out at the chosen point in time.
Review and approval through network partners
When a campaign is provided by the master client a new campaign is created in the subordinate network partner client automatically:

When a new campaign is created or updated the network partner will be informed via e-mail – in case your network is set up this way.
The partner can now check the campaign in the campaigns → drafts section and give their approval or revoke it:

- The partner can only read or check the e-mail content (e.g. quality control or test mailing).
- No changes can be made.
- Approval is given by one person.
- The approval is given or revoked with one click.
