Table of Contents
How to import addresses?
Address data can be added to promio.connect using the address import. After a successful import, this address data is available in promio.connect as a target group.
Only upload addresses from which you have an “opt-in”. This means that the owners of the addresses have actively and knowingly allowed you to store and use the address and further personal data to contact them! In the event of complaints and in cases of doubt, you must be able to prove where and when you obtained the address.
Go to Addresses > Lists and select import addresses after clicking on the button on the bottom right. You may either upload the data directly from your PC, or you can store it at the SFTP server of your client and then upload it from there.

Import directly from PC
Click on Choose file from PC.
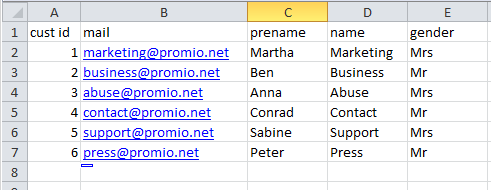
Pay attention to only uploading an error-free .csv file. If you want to personalize your address data, you can assign the data fields of promio.connect to the file’s columns. Your file should look like this or similar. Doublets will be filtered out, which means every address will only be uploaded once.
Import settings

Preview address data
You can preview the address data to check the selected settings:

Automatic column assignment
When the column names exactly match the data field names, an automated assignment can be activated.
Configuration

- Charset: select between Latin or UTF-8
- Delimiter: select between semicolon, comma, and tab
- Write mode: „Update existing addresses, create new ones“, „Only new addresses“ or „Update only existing addresses“
Checklist
The checklist allows you to make sure that delimiters are selected, that at least one column of fields is assigned, and whether the correct write mode is configured. Afterwards, you can either start the import or discard it.

Choose a file from SFTP
Preparation
Before address data can be imported to promio.connect a .csv or .txt file that has to be placed in the client’s SFTP folder incoming/upload/manual.
In order to import addresses, you need an SFTP client from where you can upload the data securely. FileZilla, e.g., is a free and uncomplicated client that allows you to do so. The access data to the SFTP folder for your promio.connect client can be found at Settings > SSH-Keys.
The following procedure is similar to when you import from your PC.
The import process itself can take a few minutes. The status of the import job can be tracked at Settings > Job queue. When the import is successfully finished, the newly imported addresses are available as a new target group at Addresses > Lists. The list can be adjusted or used for a campaign.
Please note that e-mail addresses with syntax errors will automatically be sorted out during the import process.
The process also detects doublets within an address file. This means, depending on the data management settings for the client (default: e-mail; alternative: cust ID), only the first one of these doublets will be imported when the same e-mail address (or cust ID) is included more than one time in the .csv file.
Email addresses which are already on the email blacklist will also be sorted out automatically.
Watch a tutorial on how to import addresses manually: