This is an old revision of the document!
Table of Contents
How to create a filter?
You can apply predefined filters when assigning a target group to an e-mail or when using the target group function filter.
This entry explains how to define and save filters.
Filters can be used in standard campaigns as well as in the workflow of auto campaigns.
In auto campaigns the usage is not part of promio.connect by default. Please contact your account manager if you are interested.
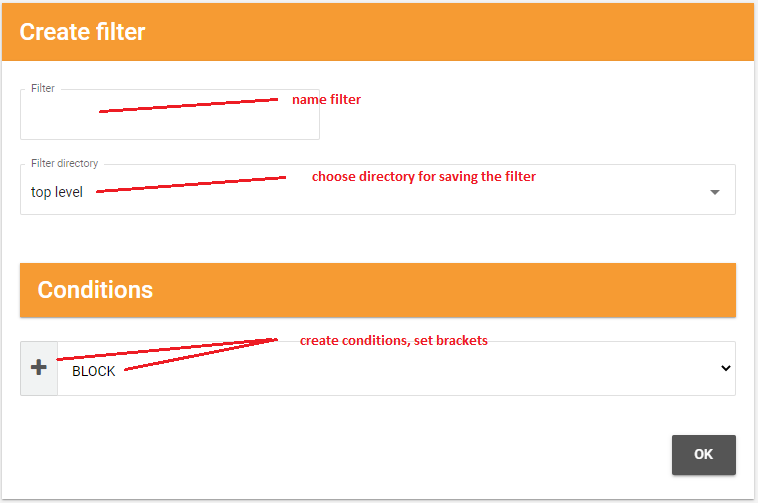
Create and name filter and directory
Go to filter management via Addresses > Filter.
With this button you create a new filter or a directory for multiple filters.

Create directory
Here you can generate new subfolders in which your filters can be saved.
Create filter
Here you can name your new filter, save it in a subfolder and define its conditions.
Defining conditions
Compose your filter by combining one or more conditions. The following types of conditions are available:
| Bedingungstyp | Beschreibung |
|---|---|
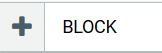
| BLOCK | Create a new bracketed block to control the AND / OR sequences. |
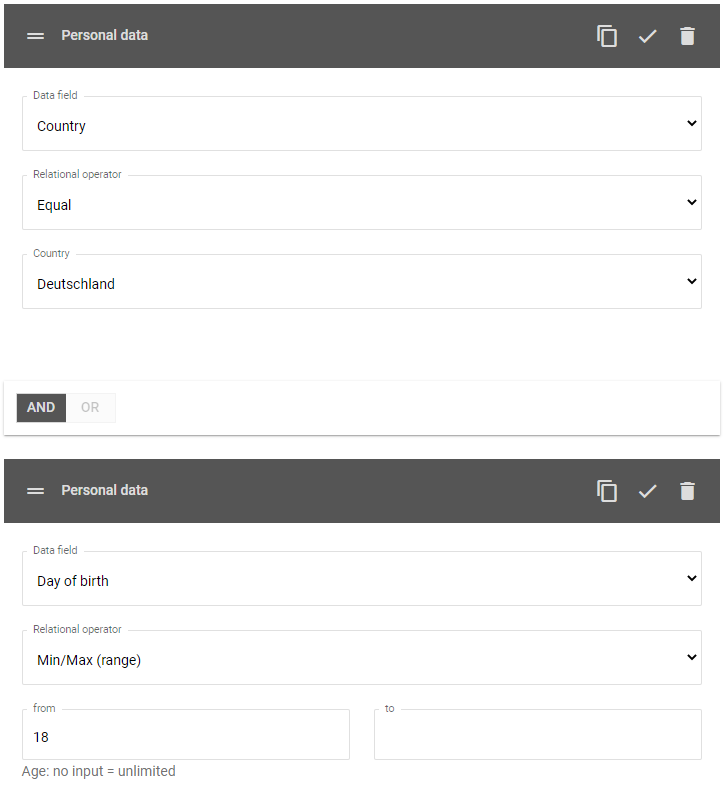
| Personal data | Filter by master data content. Typical cases: Men, zip code areas, Germany 18 +, addresses associated with the domain @web.de, etc. |
| Auto Target Group | Filter by a user’s inclusion / non-inclusion in an existing auto target group. |
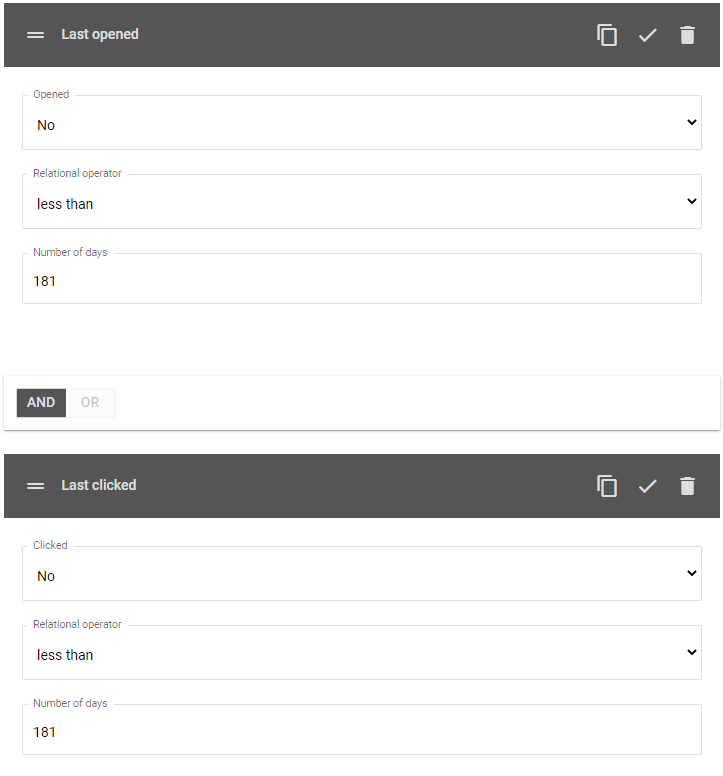
| Last opened | Filter by when your users last opened en e-mail. Typical case: No opens in the last x days |
| Last clicked | Filter by when your users last clicked a link in your e-mail. |
| Last addressed | Filter by when or whether an addresses was contacted. |
| Bounced | Filter by when or whether an address created a bounce. |
| Activity Score | Filter by opening and click rates. additional feature |
| E-Mail: Recipients | Filter the recipients of a specific e-mail. |
| E-Mail: Open | Filter by whether a specific e-mail was opened. |
| E-Mail: Click | Filter by whether a user clicked in a specific e-mail. |
| E-Mail: Click on specific link | Filter by whether a user clicked a specific link in an particular e-mail. |
| E-Mail: Conversion | Filter by whether a particular e-mail triggered a conversion. Typical case: Non-subscriber of an e-mail. |
| E-Mail: Bounce | Filter by whether a particular e-mail generated a bounce. |
| Profiler | Filter by whether the user is associated with a specific profile. The profiles can come from click profiles, the Profiler360, or a stored Profiler questionnaire. additional feature |
- Select the condition type in the drop-down menu BLOCK
 and add the condition by clicking the PLUS. You may now edit it.
 - Fill in the necessary details, e.g. select an e-mail, choose the operator, or specify a value or list.
- If you want the filter to contain more than one condition, add another condition via BLOCK and PLUS.
The condition type Personal data gives you the option of filtering by several values. Choose the operator In the list to do so. Enter the values separated by a comma, e.g. “Munich,Cologne,Hamburg”.
The condition type Personal data also allows you to search for strings by using wildcards in combination with the operators Equal and Unequal. Use * or ? as follows:
- Example 1: *@promio.net returns all e-mail addresses that end in @promio.net.
- Example 2: *gmx* returns all addresses that contain the term 'gmx'.
- Example 3: 531?4 returns all conforming zip codes like 53104, 53114, 53124 etc.
The type Profiler is only available if this feature is activated in your client.
Link conditions and set brackets
Multiple conditions can be combined with an AND or OR link. By default, two conditions are linked with AND. The active link is marked with a dark background.
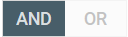
An AND link means that in order to be selected by the filter, data records must meet BOTH conditions. Example: male AND over 20 years old.
An OR link means that in order to be selected by the filter, data records can ONLY meet ONE of the linked conditions. Example: female OR subscriber of e-mail “2016-01-20 Shoes Available Free of Charge”
To define more complex filters, you can set bracket blocks to selectively control the AND / OR links. Select BLOCK as the condition type to create a bracket block.
Brackets affect your filter’s logic!
Example: Condition 1: male | Condition 2: First name equals “Andrea” | Condition 3: female
Condition 1 AND Condition 2 OR Condition 3 - Conditions 1 and 2 must be met, OR condition 3 must be met.
Result: all men named Andrea, as well as all women
vs.
Condition 1 AND (Condition 2 OR Condition 3) - Condition 1 must be met, AND one of the conditions 2 and 3 must be met.
Result: all men named Andrea
Safe filters
Wenn Sie alle Bedingungen final bearbeitet haben, speichern Sie den Filter mit  ab.
ab.
Only fully defined filters can be saved. A condition that contains errors will be highlighted in red. Correct or complete the highlighted condition and click OK again in order to validate and save the filter.
Further options
On the upper right of each filter condition you can edit these:
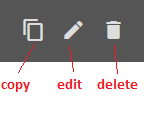
With the first symbol you can copy a condition. The copy will be inserted beneath copied one.
Via the check mark you can close or collapse a condition and its parameters.
By clicking the bin sign you delete a condition.
If you want to alter the order of conditions you can switch them by drag&drop.
Closed conditions ensure a better overview, especially in the case of complex filters. If a condition’s definition contains errors, the condition cannot be closed and is highlighted in red.
 You can also delete the entire filter. Deleted filters remain in the subfolder. Gelöschte Filter sind im Ordner Papierkorb einsehbar, aber nicht mehr editierbar.
Examples
No reaction during the last 6 months:
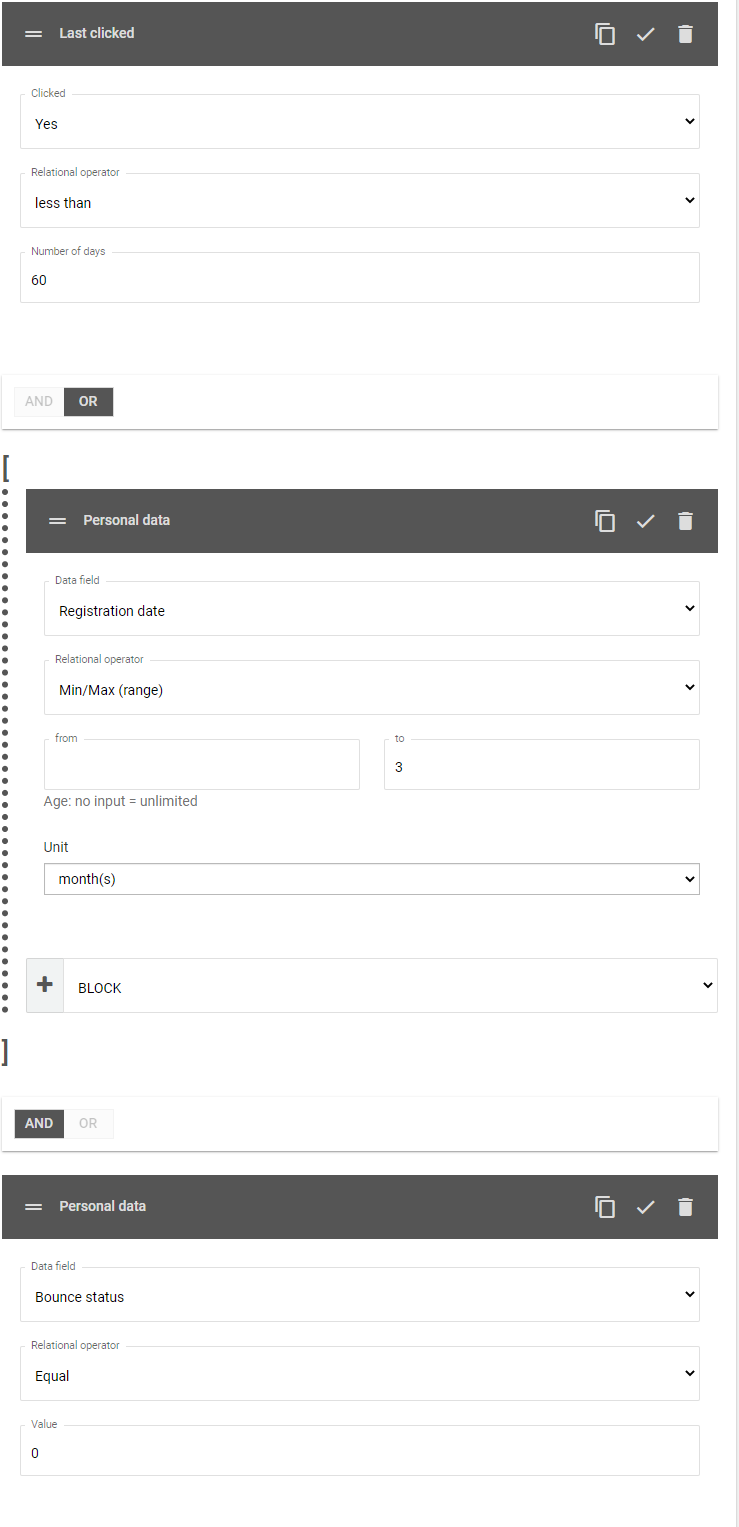
Active User:
Germany 18+: